
gnoMint
A GTK 4 Certification Authority manager
View the Project on GitHub davefx/gnoMint
- Source code
davefx/gnoMint on GitHub - Latest release
1.6.8 "Tempered Anvil" (2026-06-20) — changelog - License
GPL-3.0-or-later
Tutorial: a small-firm PKI with OpenVPN
Adapted from the original “gnoMint tutorial” by David Marín, written circa 2008 and recovered from web.archive.org. The text has been updated for recent gnoMint releases, with fresh screenshots from the current version. The user manual covers the same actions without the worked example.
This tutorial walks you through using gnoMint to set up the Public Key Infrastructure for a small firm. We assume:
- a Linux firm headquarters,
- four offices spread across the country,
- a VPN built on OpenVPN for connecting the offices,
- and X.509 certificates for authenticating the VPN peers (so the VPN can grow without too much trouble).
We will use a single self-contained gnoMint database to hold all certificates issued for the firm.
Planning the CA
Before launching any application, let’s think about the CA we’re going to create. In this example we want a single Root Certification Authority for the firm, so all issued certificates live in one database. The Root CA will only issue subordinate CA certificates, which will be specialised — it’s a recommended practice for a given CA to issue certificates with consistent properties.
We’ll create three subordinate CAs:
- Systems CA — for VPN-node certificates (using OpenVPN).
- Employees CA — for individual staff certificates (S/MIME signing and ciphering, plus intranet TLS authentication).
- Software signing CA — used by the development groups to sign security patches and new releases.
Migration note: if you already have a PKI built with OpenSSL (the
openssl cascript, tinyCA, OpenVPN’seasy-rsa, etc.), gnoMint has been able to import it into a.gnomintdatabase since version 0.6.0.
Generating the Root CA
Install the latest gnoMint (see the install guide), then launch it:
$ gnomint &
The main window opens with the default database
(~/.local/share/gnomint/default.gnomint on current versions, the
legacy ~/.gnomint/default.gnomint on older).
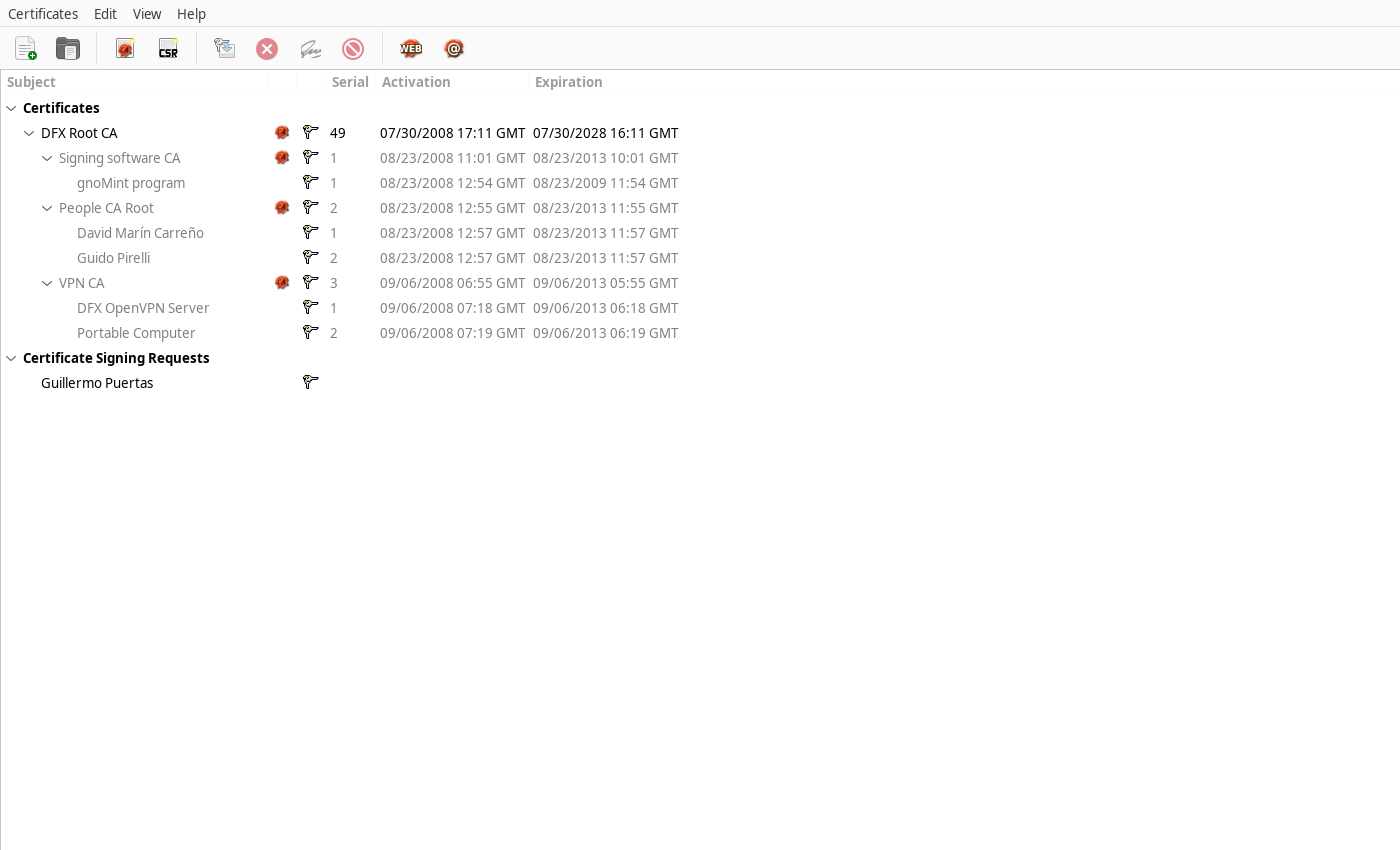
Choose Certificates → Add → Add self-signed CA. The “new CA properties” dialog appears.
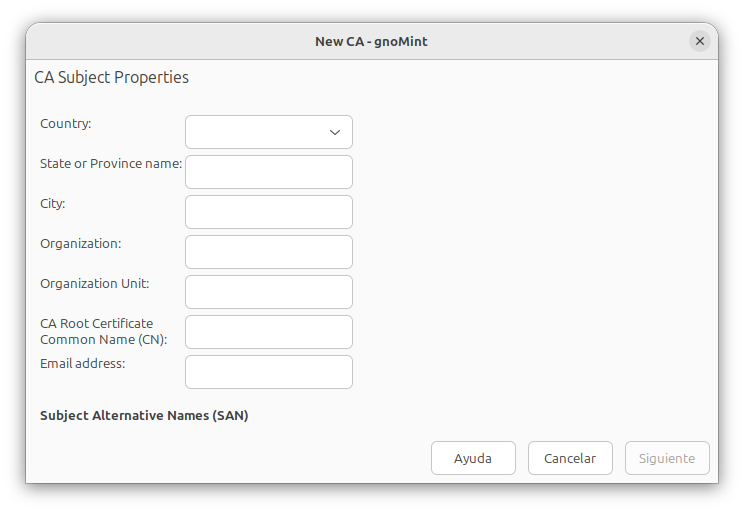
- Fill in the subject fields (CN, OU, O, L, ST, C).
- Press Next.
-
Pick a key algorithm. RSA is the historical safe default; gnoMint 1.4.0 added ECDSA (P-256/P-384/P-521) and Ed25519 too. The original 2008 tutorial chose RSA 4096 (or 5120) for a long-lived root — for modern hardware ECDSA P-384 or Ed25519 give equivalent security at smaller sizes.
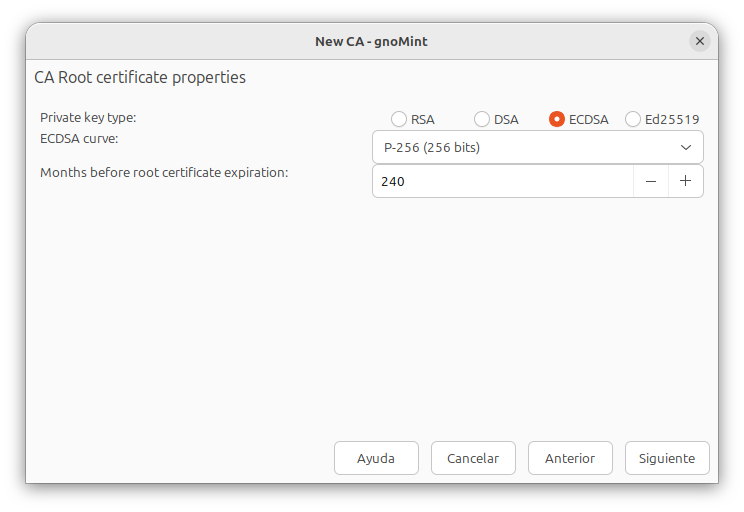
- Set the validity period. For a root CA, 20 years (240 months) is reasonable. gnoMint is Y2K38-safe, so dates past 2038 work correctly.
Press OK. Key generation runs in a worker thread; you’ll see a progress dialog. When it finishes, the new Root CA appears in the tree.
A small seal icon next to the certificate marks it as a Certification Authority (allowed to sign other certificates). A keys icon marks rows whose private key lives inside the database — that’s a security consideration we address next.
Protecting the gnoMint database
Anyone with a copy of the .gnomint file holding a private key can
issue certificates with that key. gnoMint offers two complementary
mitigations:
- Encrypt every private key in the database with a passphrase. All keys are encrypted with PKCS#8 (PKCS#12 3DES wrapper, as exposed by GnuTLS) when at rest. Without the passphrase nobody can use the key.
- Keep the Root CA private key in a passphrase-protected external file. For maximum security, this file lives on a removable device (USB stick) that is plugged in only when you actually need to sign something with the root.
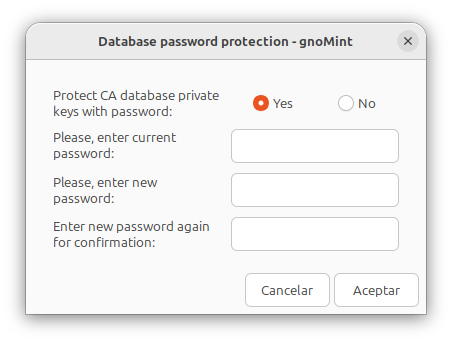
The two are not mutually exclusive — it’s reasonable to use both. For this tutorial we’ll take the simpler option (in-database with passphrase). Choose Certificates → Change Database Password, set a new passphrase, confirm, and the database is protected.
Establishing Root-CA policies
Now we configure the policies for the Root CA. Policies decide what the CA is allowed to sign and what defaults its issued certificates inherit.
Double-click the Root CA (or select it and pick Edit → Properties) and open the third tab. Configure:
- Uses of new generated certificates — pick Certification Authority and CRL generation. These are the only things the Root CA should produce.
- Inherited fields — force the Country and Organisation fields on subordinate CA certificates to match the Root’s. The other fields are prefilled but editable per-certificate.
- Validity — set the default expiry for subordinate CA certificates to 5 years (60 months).
- CRL period — set the recommended interval between CRLs to 168 hours (7 days).
Creating CSRs for the subordinate CAs
With the Root configured, we create three CSRs (certificate signing requests) — one per subordinate CA. Each CSR will be signed by the Root CA to produce the subordinate’s certificate.
Choose Certificates → Add → Add Certificate Request.
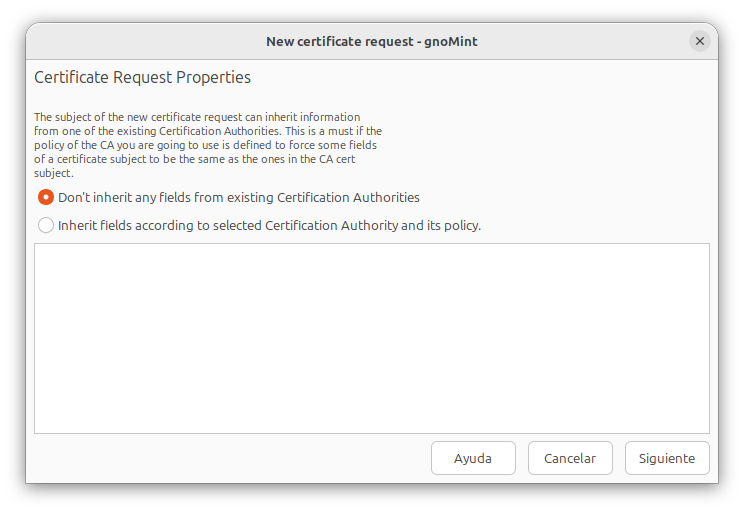
- In the first step, pick the parent (Root CA) so the subject fields are inherited.
- Press Next and fill in the new subject — start with the Systems CA, the one that will sign certificates for the VPN nodes.
- Press Next and pick key properties. RSA 2048 is plenty for a subordinate that will expire in 5 years.
If the database is password-protected, gnoMint asks for the passphrase before saving the CSR’s private key.
If you don’t see your CSR after creating it, check View → Certificate Signing Requests — the filter may be hiding them.
Repeat for the Employees CA and the Software Signing CA, so you end up with three CSRs in the database.
Signing the CSRs
Now sign each CSR with the Root CA to produce the subordinate CA certificates.
Select a CSR and choose Certificates → Sign (or right-click the CSR and pick Sign). The wizard appears:
- Confirm the CSR is the right one.
- Pick the signing CA (the Root, in our case).
- Review certificate properties. The recommended option is to use the CA policies as defaults, but you can override per-certificate. Note: you can’t escape what the policy forbids — e.g. if the Root’s policy only allows Certification Authority and CRL signing, you can’t enable Digital signature on a certificate signed by the Root.
Press OK. gnoMint asks for the database passphrase (to access the Root’s private key), signs the CSR, and adds the new subordinate CA certificate to the tree.
Repeat for the other two CSRs. You now have three subordinate CAs, each ready for its specialised job.
Defining subordinate-CA policies
Open each subordinate CA in turn and configure its policies.
Systems CA
- Allowed key uses: digital signature, key encipherment, key agreement.
- Allowed purposes: TLS web server, TLS web client.
There’s one exception: only the VPN-server node should have the TLS web server bit. You can either flip it off on each client cert at issuance time, or issue all the clients with the bit on and clear it afterwards. We’ll do the latter — easier to remember.
Employees CA
The employees need to do email signing and ciphering plus intranet TLS authentication.
- Allowed key uses: digital signature, key encipherment, key agreement.
- Allowed purposes: TLS web client, Email protection.
Software signing CA
- Allowed key uses: digital signature.
- Allowed purposes: Code signing.
Issuing the VPN system certificates
The VPN will have one central server and three remote clients (the Barcelona, Madrid and Seville offices). We need four CSRs, all signed by the Systems CA.
A more secure approach is for each remote office to generate its own CSR locally and email you only the CSR — CSRs contain no private material so they can be sent over insecure channels. But for this worked example we’ll assume you (the only technical employee in the firm) are creating all of them.
For each VPN node:
- Certificates → Add → Add Certificate Request. Inherit from the Systems CA.
- Fill in the subject — CN is the hostname (
vpn.example.com,client-barcelona.example.com, …). Add the DNS SAN to match. - Pick a 2048-bit RSA key (or ECDSA P-256 on modern gnoMint — same security, much faster handshake).
- Save the CSR.
Once the four CSRs are in the database, sign them with the Systems CA
(same workflow as before). You now have four VPN-node certificates plus
their private keys, all wrapped inside one .gnomint file.
Exporting certificates for OpenVPN
For each VPN node, export:
- the node’s certificate (PEM),
- the node’s private key (PEM, optionally PKCS#12 if your tooling prefers it),
- the Systems CA certificate (for the CA file),
- the full chain if you want a single bundle (gnoMint 1.4.0: Export full certificate chain in the contextual menu).
Distribute the per-node certificate + key over a secure channel (SCP/SSH to each office is fine). Don’t ever copy a private key across an unencrypted link.
OpenVPN’s ca directive points at the Systems CA certificate, cert
at the per-node certificate, and key at the per-node private key.
Where to go next
The original tutorial ends here (“To be continued…”), but the user manual covers the rest of the day-to-day workflow:
- Issuing employee certificates from the Employees CA
- Code-signing with the Software Signing CA
- Revoking compromised certificates and publishing CRLs
- Bulk operations (revoke many at once)
- Renewal
- Importing CSRs created externally
- The CLI version of all of the above